DIY Lights
The following devices are currently supported:
Generic PWM CCT lights (2 channels) - ex Milight bicolor
generic PWM RGB lights (3 channels)
generic PWM RGBW lights (4 channels) - ex. Feican bulbs
generic PWM RGB-CCT lights (5 chnnels - ex Milight FUT015)
SK6812 Neopixels
WS2812B Neopixels
All ZigBee lights - check Raspbee module page
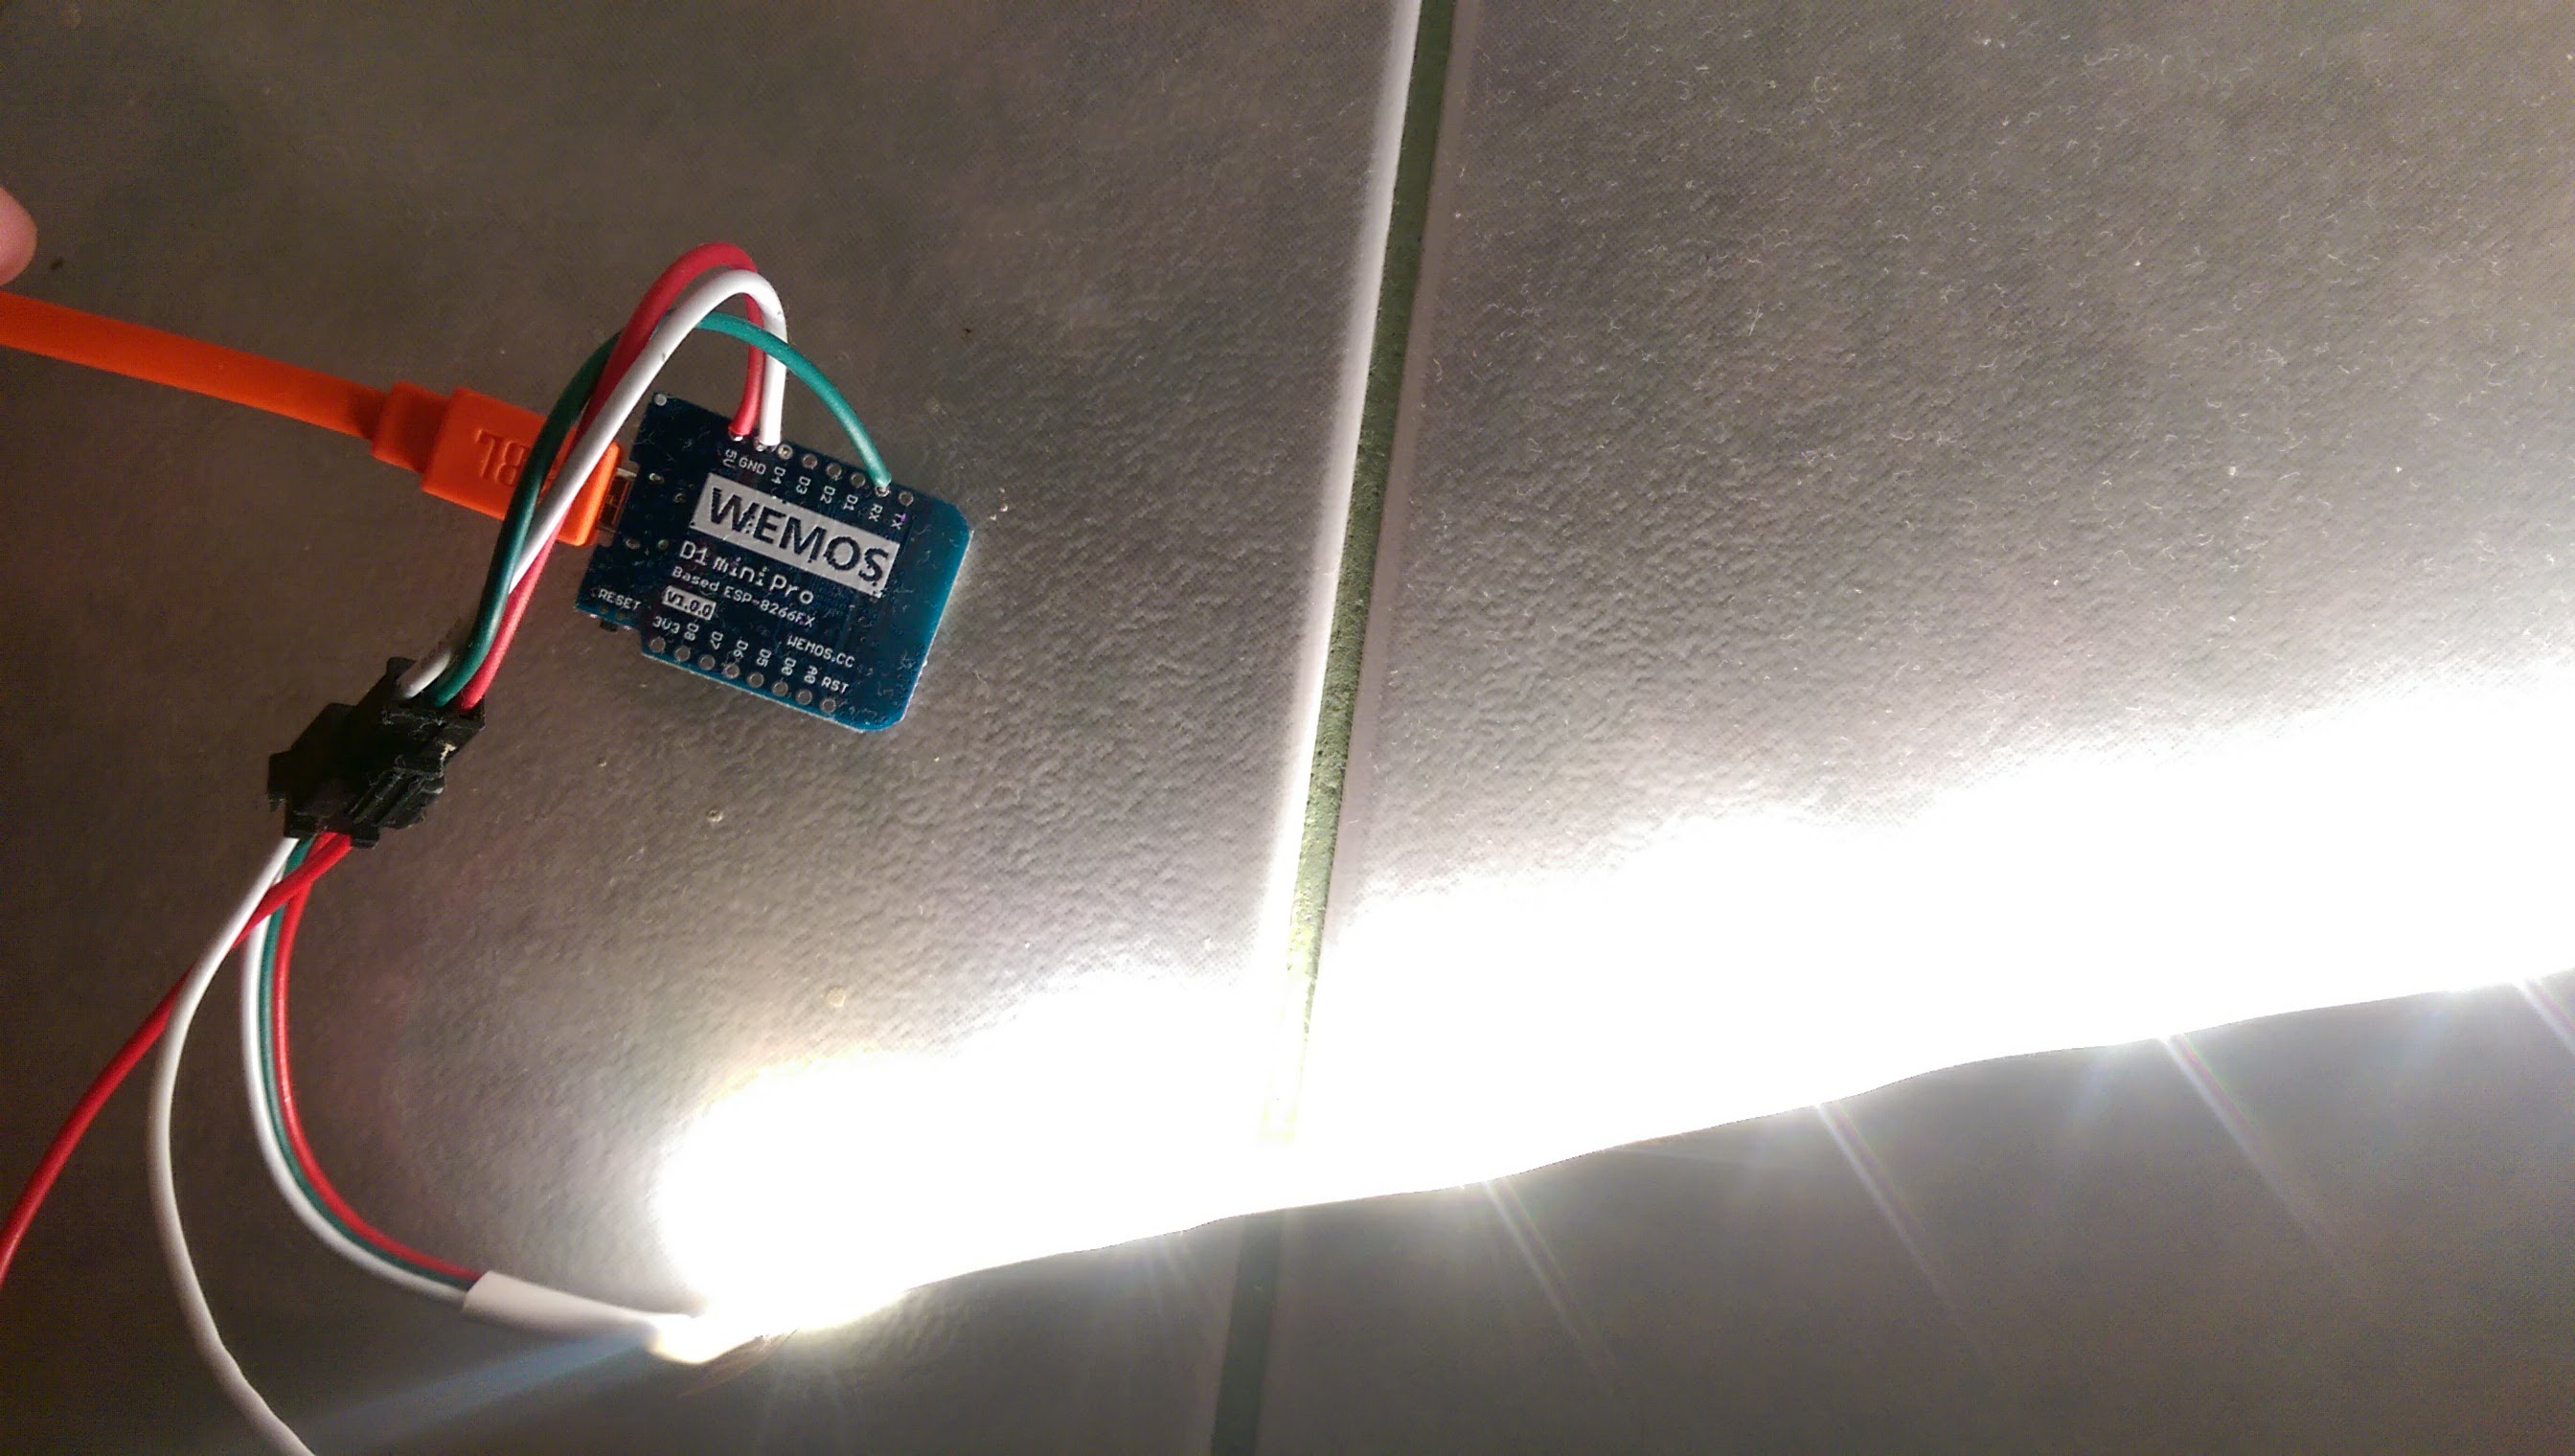
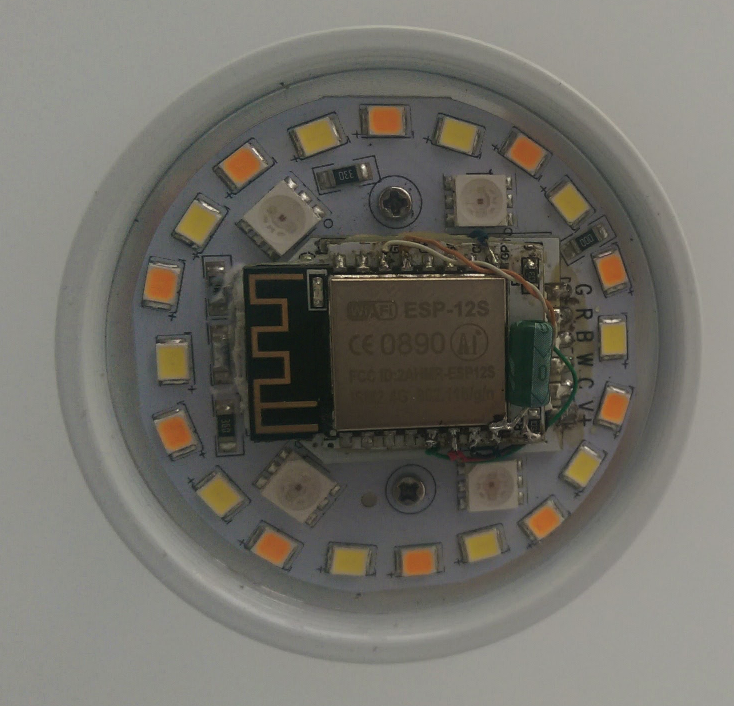
A lot of Wi-Fi lights from the market are ESP8266 based and can be used very easily with this project by flashing the firmware with one provided. Almost all dimmable lights that are not ESP8266 based (ex MiLight bulbs) can be converted to Wi-Fi with one ESP-12S module by connecting the outputs directly to led drivers (picture available). If you decide to convert a MiLight bulb to ESP-12S, then I recommend to use a micro step down buck converter in order to avoid overheating issues.
All lights are two way synchronized so any change made by 3rd party device will also be added to the bridge emulator on the first request to each light group. By default any light that become unreachable will be marked as unreachable and will be displayed as off. This is because a lot of people still use classic light switches.
Light GUI

All lights have an internal web GUI that can be accesses with any browser and offers the following options:
Turn the light on/off
Set startup option:
Light Off (default)
Light On
Last State (Turns the light on to the same state as it was the last time it was on)
Change the scene. This will change also the power on scene
Change any light parameter (bri, color, ct, xy, etc)
Flashing Firmware
The easiest way to get our custom firmware onto one of the ESP8266 based Microcontrollers (NodeMcu / Wemos etc) is to you our Web Installer.
Select the Sketch according to your hardware. Flash!
Configure your new diyHue Light by connecting your smartphone to the new Wifi Accespoint. Enter your local Wifi Settings and Password. Save Search for new Lights in your App.
Enjoy
Note: You need to use Chrome Browser or Edge
Regular Way:
In the new version is mandatory add SPIFFS storage to the ESP module. Try to choose the maximum possible size. For NodeMcu/Wemos D1 mini that have 4Mb of flash select 4M with 3M SPIFFS. You will know if the SPIFFS storage is properly set by looking at wifi manager broadcast SSID, if is in format ESPxxxxx then you must try different SPiFFS option. Future upgrades can be performed manually by exporting the compiled binary file from Arduino and upload it using any browser by accessing /update http location of the light.
Neopixels
Before compiling the code, you must set the lightsCount and pixelCount variables.
lightsCount is the number of virtual lights to create from your NeoPixel strip.
pixelCount is the total number of NeoPixel LED’s in the connected strip . transitionLeds represents the number of LEDs used for smooth transitions of colours between lights.
I recommend using atleast 3 lights, one light at every 20 - 50 LED’s so you can enjoy Hue scenes and Hue Entertainment.
The data pin of the LED’s must be connected to RX pin of the ESP8266 board. Make sure to disconnect this when uploading or it could fail.
Generic lights
If your device is factory ESP8266 based, then you must specify the pins used by that device in setting page of the light web gui. If you don’t know what pins are used or what color is controlled on a pin then try random pins. I recommend using the MiLight FUT15 bulbs converted to ESP-12S because of it’s high brightness and good color reproduction.
Connecting the lights to a Wi-Fi network
All lights are using WiFiManager and on power up, will broadcast for 2 minutes with the SSID set in the light_name variable (the defaultis Hue .....)
Connect to this network with you phone or computer and browse to http://192.168.4.1
From here you can choose the SSID of the network you would like the light to connect to and enter its password.
After the light is present on your network open the official Hue application and scan for new lights.
In case no lights are found, check if the nmap package is installed.
Note: The app will often say no lights found but the lights will then appear a few seconds after this notification. So be patient!
Lights API
The lights use the same Hue protocol however, for sketches with multiple lights the state of every light is added in a root key that identify the light id.
detection url: http://{light ip}/detect
sample output:
{"name":"Living ","protocol":"native_single","modelid":"LCT015","type":"rgb-cct","mac":"A0:20:A6:2C:FB:26","version":2}
API for light control or state read
http path:
http://{light ip}/statehttp mode: GET for read, PUT to set a new state with json body
Example json body for devices with single light (generic RGB, generic RGBW, generic RGB-CCT):
{"on":true,"bri":144,"xy":[0.53, 0,21]}Example json body for devices with multiple lights:
{1: {"on":true,"bri":144,"xy":[0.53, 0,21]}, 2: {"on":true,"bri":144,"ct":370}, 3: {"on":false}}to read the state of a light is required to specify the light id in the urlhttp://{light ip}/state?light=2. If not light is specified the state of light id 1 will be returned.
Arguments that can be passed in the URL:
on: 1 to set light on, 0 to set the light off.r,g,b: Set the light color using RGB values between 0 and 255.xandy: Values between 0.0 and 1.0 to set the light color using a CIE chart.ct: Value between 153 (max warm white) and 500 (max could white) http://en.wikipedia.org/wiki/Miredhue: Value between 0 and 65535, representing the hue of the light.sat: Set the saturation of the light. 255 is the most saturated and 0 is the least saturated.bri: Set the brightness of the light, 255 is the maximum brightness, 1 is the minimum, 0 will turn the light on to previous statetransitiontime: Duration of the transition from the light’s current state to the new state. The default is 4 representing 0.4 seconds.bri_inc: Increase or decrease the brightness with a specified value
Firmware upgrade
You can upgrade the firmware very easily by saving the binary file from Arduino to local disk and uploading it using /update page of the light web ui